Saturday 30 May 2009

More Pink Quilt Progress

As promised, here are some photos of my progress!
Don't you just love a post with lots of photos???

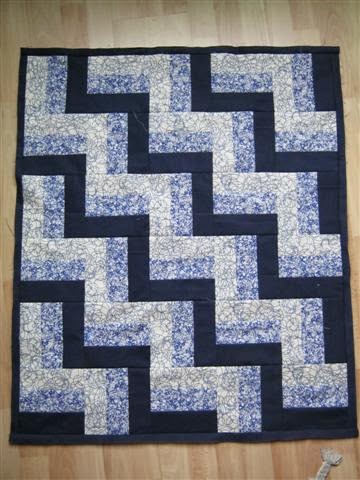
Here's my quilt top, all ready to go and patiently waiting for months it seems...

I joined the two pieces for the back. I think I will JUST have enough material, but really just. In fact, I might have to crop half an inch off the border of the top. I really mean "just enough".

For some reason, I had very little trouble taping the backing to the floor. Either I'm getting better or the material didn't stretch as much as some previous backing fabrics I've used.

The batting was too thick - my quilts are more for looks or summer/spring seasons, not for warmth, and I find it much easier to get the quilt sandwich into my machine when the batting is thin. So I went about tearing the batting in two - the one thing I like about synthetic batting, though once this stuff is used up, I'll probably switch to cotton.


Baby quilt batting is so easy to tear, try doing a queen sized quilt, phew!


I do enjoy walking around on a quilt though... maybe I'll make a carpet quilt some day ;)


And now I'm happily pinning along - it's turning out not quite as bad as I had anticipated - mostly because the taping went smoothly. For my first large quilt, I had to retape so many times because the material kept getting uneven...

I just realized that this will be only my second large quilt that I'm quilting. All the other quilt tops are either waiting for a backing or some finishing touches. How exciting!

As I was commenting on Mal's blog turning*turning that amongst all my chores before work on Friday, I allowed myself to put just one pin into the quilt, even though I was running late already, but I felt like I had "quilted" just a little bit and left for work in a great mood! One pin, so easily pleased, eh?


All ready for quilting!

Stacked Coins Are All Stacked Up

Finished quilting the stacked coins baby quilt. I really like it. I debated for a while what colour binding to use. I had some 2.5" strips of blue green fabric already cut from another project, and was going the lazy route, when I realized that I just didn't like that colour enough and went and cut dark blue 2" strips instead for a tighter and more masculine binding.

While I was cropping the quilt, I realized, shock oh shock, that I once again (grumble) had some of the overhanging backing slip under the needle and be incorporated into the stippling. Aaargh!!!


Last time this happened, I opened the stippling up and re-sewed. This time I tried picking out the fabric and leaving the stippling in place.


It worked except for one single stitch that ripped (probably because I was on the phone at the time and distracted).


So I had to get the machine out and sew over it anyway, sigh. But I think it'll be okay. Still though, annoying... maybe I'll learn from it this time. New resolution: crop sandwich to within 1" of top before quilting!!!

I'm doing the invisible stitch again, what a great method that is!

One evening of half watching a movie yielded almost half a quilt bound. Almost done!

Friday 29 May 2009

Hello Weekend!

I just wanted to show you that my owl quilt is getting some good use on the couch and wish everyone a happy weekend!

My Summer Dress

I'm making a dress - my first dress, and my first piece of clothing following a pattern.
I think the sun out there nudged me enough to tear open this pattern I bought in January - actually it was free because I bought so much fabric ;) -and start reading the instructions - there are so many of them!


I got out the pattern paper and unfolded it. I bet even if I had tried, I could have never ever put it back into the envelope.


First of all, I was told to iron the pattern before cutting. Iron paper? Like it's not enough that I'm ironing meters of fabric every week because I can't stop buying, now I'm ironing paper too? I felt a bit weird during the process. :)


Then I had to cut. A lot of pattern pieces. Why do these things not come pre-cut??? I cut out the largest size anyone, and will just fold over the edges, because what if I gain weight before the next time I want to make this dress? Sigh. I bet THEY (at the pattern factory) could stamp out the pattern pieces en masse and in no time at all.


This is my most precious piece of the pattern, because most of the instructions are already confusing me. I'm not a pattern/recipe person, I even cook by dumping stuff in a bowl and tasting it occasionally. Hmmm, definitely a new experience, this pattern-sewing...


I then went about laying the pattern onto the fabric for cutting - a scary process: different shading means the pattern must face up or down, on the pattern it says how many pieces to cut - but this didn't correspond to the layout shown on the instructions, hmm, tricky.


I cut anyway, and have a nice accumulation of pieces now. I peaked at the sewing instructions and *freak* they've changed terminology and instead of saying: sew piece 1 to piece 2 it's now midriff this and that. I don't know what half these terms mean - I already looked up "nap" in the dictionary. Gosh, it'll be daunting, good thing I have a seam ripper :)

Stay tuned for the next installment of the summer dress!

Thursday 28 May 2009

Forgot The Camera

I was so productive yesterday but forgot to bring the camera to download the photos... next time! Instead, I'll give you a sneak pre-view of the fabrics for the bento box quilt that I'll write a tutorial for when it's done. Being finished is kind of a pre-requisite for a tutorial, isn't it? Otherwise it's more of a quilt-along. Those are a lot of fun too, I bet...

Bento Box fabric pairs

But I pinned and quilted the baby quilt (stacked coins) so it's ready for binding, and I also re-visited the pink quilt, as there was nothing holding me back from finishing it other than the deadlines for the bento box quilt (it's for a wedding in July) and the baby quilt (baby due this week, not mine ;). I even have the binding strips joined already! So I finished the backing yesterday, and I'll probably pin it today.


Here's an old picture to refresh your memory :)

Is it wrong of me to say that I hate pinning large quilts??? I always imagine my rented hardwood floor getting totally scratched from all the needles piercing through the fabrics on their way through the sandwich, but so far, I haven't found any scratches yet (after every quilt, I lift it off the ground with trepidation ;)

I know some of you have recommended the basting spray before, but I have to say that a) I'm (probably unreasonably) suspicious of spraying anything onto a quilt when it's so close to completion, and b) I like to use pins as I can re-use them. It's my minimalistic streak. I might try the spray on a baby quilt some of these days, though.

A propos the baby quilt. I really really didn't want to stipple it, and I started 10 cm of a different pattern, but hated it, so ... I went back to stippling. I need to come up with something else, but stippling just seems to be the fastest (other than straight lines with the walking foot) - an important factor when the quilt has a dead line - and looks nicest for the free-motion quilting.

If anyone of you lovely blog visitors and quilters has some suggestions, send them my way, please!

Monday 25 May 2009

BC Is Beautiful!

I'm back from my trip, which was breath taking!

Living in flat PEI, the mountains out west are quite a sight...

My gracious hosts had to listen to so much talking about quilting that they dragged me to any quilt store they could find just to shut me up *grins*.

Here's my haul:

Some Denyse Schmidt Flea Market Fancy


Some Kaffe Fassett - less bright than usually

They came in really cute fat quarter packs with fabric ties and the store was really darling.


In Victoria, I found an "everything store" that had a fabric section containing these adorable farm prints (the pigs are a separate fabric).

... and these cute bugs on flowers.

These frogs are to die for, and this was the last fat quarter they had!


And a few more, including a bit of Moda Wonderland fabric, that will come in handy for the charm packs I bought!


The day I came back, I whipped up this baby stacked coin quilt for a friend's baby shower. The back is done too, so just need to sandwich, quilt and bind. The baby is due this week...


Once I have the Bento Box quilt done, I'll post a tutorial for my strange way of making it ;) Let's hope it works, haha!

Thursday 14 May 2009

See You Next Week!

I have one week of very intermittent internet and no quilting ahead of me - luckily there are fun alternatives like seeing friends and cool places...

So stay tuned! I'm working on a Bento Box Quilt Tutorial and I'm attempting to make a summer dress for myself!

Till next week :)

Cheers,
Christine

Wednesday 13 May 2009

This One's For Nanci!

Nanci of QuiltingAtTheCottage posted a recipe for Cowboy Bread yesterday, and I promised her I'd try it and post about it. Well, everything she said about the recipe is true: it's quick, easy and absolutely delicious! I love baking that only involves one mixing bowl, no separating of eggs or any French words (unless the whole recipe is in French).

Here's the result of the 30 min foray into baking


And this is what it looked like 5 min after it was cool enough to cut and eat. It was really weird: I just couldn't stop myself...

Today was a field day at work, and I took half the cake for my colleagues - they inhaled it!

Thanks so much Nanci, the Cowboy Bread will be added to my all-time-favourites list of recipes. Though I hope you forgive me if I rename it to Nanci's Cottage Cake :)

Tuesday 12 May 2009

Truly Invisible!

I just wanted to show you how invisible the "invisible ladder stitch" is! See for yourself:
(I machine-sewed the binding to the front, then hand stitched on the back of the quilt)


Monday 11 May 2009

Pink Zigzag Complete

I had the binding on this quilt done in no time! So small :)


I used the invisible ladder stitch that Mal and her mom presented on turning*turning. At first it went really slowly, but after half a side of the quilt, I was zooming along and it does look SOOOO much better! The binding looks the same front and back, it's amazing, and the stitches are just as secure as the whipping stitch. I highly recommend it!
I spaced my stitches 1/4" apart as I found this easiest to eyeball from all the seams I see all the time.


And here's the packaged quilt that travelled with me this weekend - I find that sheet set packages work really well to protect small quilts when traveling - it's such a nice sturdy plastic.

Another MODA Treasure

These goodies arrived in the mail JUST before I left for the weekend. Beautiful beautiful colours! I think I'll find it a lot easier to work with these squares than the floral ones from the other pack I bought recently! One of those Wonderland charm packs will definitely turn into a baby quilt like Ashley's...

Friday 8 May 2009

The Mysterious Clicks

Holy cow, lots of posts from me today!

I forgot to post this video I took of the pretty pink thread going on the bobbin.

Mostly, I wanted to show you the weird clicking sound coming from that end of the machine - I mentioned it before. The repair guy said not to worry about it, but it doesn't sound nice... So if the sound works, you should hear the hum of the machine, and a rhythmic clicking. It's definitely related to something turning in the machine, because the frequency of the clicks depends on the speed of the machine.

And The Big One (Pink Quilt)

I've also been working on the Big Pink Quilt:

I've added a narrow border (3/4") of the peacock feather in purple, then a broad, improv-pieced border in light pink. The pink alone seemed to boring, so I took some left over scraps of pink patches and cut strips to add into the border.


Here it is in its full glory (it took 7 photos to get most of the quilt in one photo... I need a cool laundry line outside and someone to hold the quilt while standing on a ladder, too ;) reference to FilmInTheFridge):

I have the backing ready (it's the red pink heart fabric that you can see in a single square in the first picture, in the center, towards the bottom), and the binding cut, pieced and ironed (it'll be the solid magenta that's in the quilt also). Now I just need a few hours to sandwich this puppy and it's ready for quilting! How I'm going to quilt it? No clue yet... I might go for the spirals in the large squares, and free motion loops in between on the rectangles and little squares.

I like it when I don't have to spend a lot of thought on backing fabrics - I always find it difficult to find a fabric that looks good en masse. In this case though, the backing fabric was the first I bought :)

I can tell you one thing after all this pink quilting: I'm all pinked out!!!

Some "Oopsie" Moments and Tell-Tale Signs of Quilting

This is what happens when I quilt too late at night:

1) I get careless and stop using common sense. E.g. DON'T try to cut that one part of the fabric that the rotary cutter missed the first time by bridging your hand over the fabric pieces and pulling them apart and then cutting UNDERNEATH your hand. That's just not smart.

Luckily my reaction time was still quick enough that the cut was very small.


2) I stop paying attention and end up having to redo things like this pieced binding for the pink zigzag quilt... it was the last piece of the binding, too! Shucks...

At least it was a short seam to open; I turned over the fabric and tried again. (I think once before I was so tired, that I ripped the seam open, reattached the fabric, just to notice that I had done it the wrong way around again, geesh!)


And lastly, how do you tell you're in a (messy) quilter's apartment/house???

There are piles of fabric trimmings spread throughout the rooms! I didn't bother to photograph the smaller piles, you get the impression :)

Pink Zigzag Almost Done!

Here's the progress I've made over the past week:

The top was pieced (I added some blocks/half blocks, because I couldn't use the triangle cut offs from one side to add to the other side as I didn't use the same colour for every second zigzag strip as CrazyMom did in her tutorial)

Edges cropped:

Backing taped to the floor - I picked a light pink cotton fabric with multi-sized and -coloured bubbles. The fabric has a relief, a bit waffled, I guess. I thought that'd be neat for a babyquilt that lies on the floor, and the last baby quilt I gave away is the same size and is usually folded in half to cover the baby, so the softer cotton top can be on both sides when the quilt is used as a blanket).

Batting and top added, and the whole sandwich pinned together - with a lot of pins, because I had to stretch the batting just a little bit - it was left over from another baby quilt.

Here it is quilted and trimmed, looks the same, no? There are close up photos below.

I was trying to come up with a different way of quilting this one other than free motion stippling. In the end, I went for that because a) I wanted to have smoother quilting to off-set the straight lines of the pattern, b) I'm away this weekend and want to do the binding, so I had to get it done quickly and free motion is fast.

I did the loopy-loops along the first border - I used them on the vampire quilt too and really like the look. As you can see, I also used, ah, what's that thread called again? Where the colours change. Oh well. You know what I mean... I'm having a blackout here.

I've used this type of thread once before, on the owl quilt, but this time I really noticed that it shows a lot whenever the backthread comes through a bit. Last time I was at the shop, the repair guy was in such a rush, he yanked the thread out the wrong way so quickly, that he actually screwed up my tension settings. I've tried to remember what it was set on - it's one of those set and forget things... Don't know if I didn't get it quite right, or if the waffle material on the back was to blame - it does act differently than normal quilting cotton.

Straight lines for the outer border again, it was getting very late, past midnight, in fact.


You can see the waffle pattern on the fabric here:


I've got the binding (pieced from left over 2" strips, it'll be very very tight binding, since I fold it) ready to go, so it should be a quilt-finishing weekend!